


10 years ago, macOS held roughly a 7% market share in operating systems worldwide according to Statcounter Global Stats. Today it’s sitting at around 14%. Where will it be in another 10 years? If the current trend is anything to go by, our estimate is around the 28% mark.
The number of macOS devices in enterprise is increasing, and the number of security products for those devices needs to do so at the same rate. When it comes to our local admin rights solution for macOS, we want to provide just as much protection, customization, and abilities for our Mac users, that we provide for our Windows users, which means offering the same comprehensive feature set to all our customers, regardless of operating system.
Version 3.2 brought the Break Glass/LAPS replacement feature, Events and alerting capabilities, integration with OPSWAT’s MetaDefender Cloud API, and application Blocklisting. Version 4.0 adds four more features to the set, making it the most feature-packed Privileged Access Management (PAM) solution for Mac on the market, and bringing it closer than ever before to our Windows solution.
New in 4.0
With v4.0 comes upgraded Pre-Approval, a more comprehensive, efficient, and intuitive Run as Admin feature, Machine Learning Auto-Approvals, and support for Azure AD groups for use in Sub-Settings. Read the details below.
Pre-Approval
Pre-Approval (known sometimes as Whitelisting) refers to the method of working out which applications are frequently used and trusted, and adding them to a list which automatically allows users to elevate them when they need to (essentially the opposite to Blocklisting/Blacklisting – creating a list of applications which cannot be elevated). This method of ‘allow most, deny some’ has proven extremely resource-efficient for large enterprises compared to the method of denying all apps and only allowing elevations on a case-by-case basis.
Admin By Request v4.0 for macOS now allows for Pre-Approval of trusted applications. Once an application has been installed with Admin By Request, navigate to its corresponding entry in your User Portal Auditlog, expand on the entry, and select Pre-approve this file next to Pre-Approve (in the Actions section):
.png)
The list of Pre-Approved applications can be found under Settings > Mac Settings > Applications > Pre-Approval:
.png)
Pre-Approval is based on the application vendor or checksum.
You can also use the following commands to get the vendor’s name for the files for Pre-Approval, without having to use the Auditlog in your User Portal:
For applications (.app):
- Command: codesign -d -vv /path/app.app
- Result: Authority=Developer ID Application: VideoLAN (75GAHG3SZQ)
For packages (.pkg):
- Command: pkgutil –check-signature /path/app.pkg
- Result: Developer ID Installer: Oracle America, Inc. (VB5E2TV963)
Where VideoLAN (75GAHG3SZQ) and Oracle America, Inc. (VB5E2TV963) are the vendors.
Run as Admin
The core Admin By Request Run as Administrator feature which allows for the elevation of a single application is new and improved in version 4.0. This feature negates the need for uses to initiate an Admin Session (i.e., an extended period of time during which the user has elevated privileges on the device) to simply install on program. Elevating a single file is the much safer option compared to elevating the user’s privileges across the endpoint.
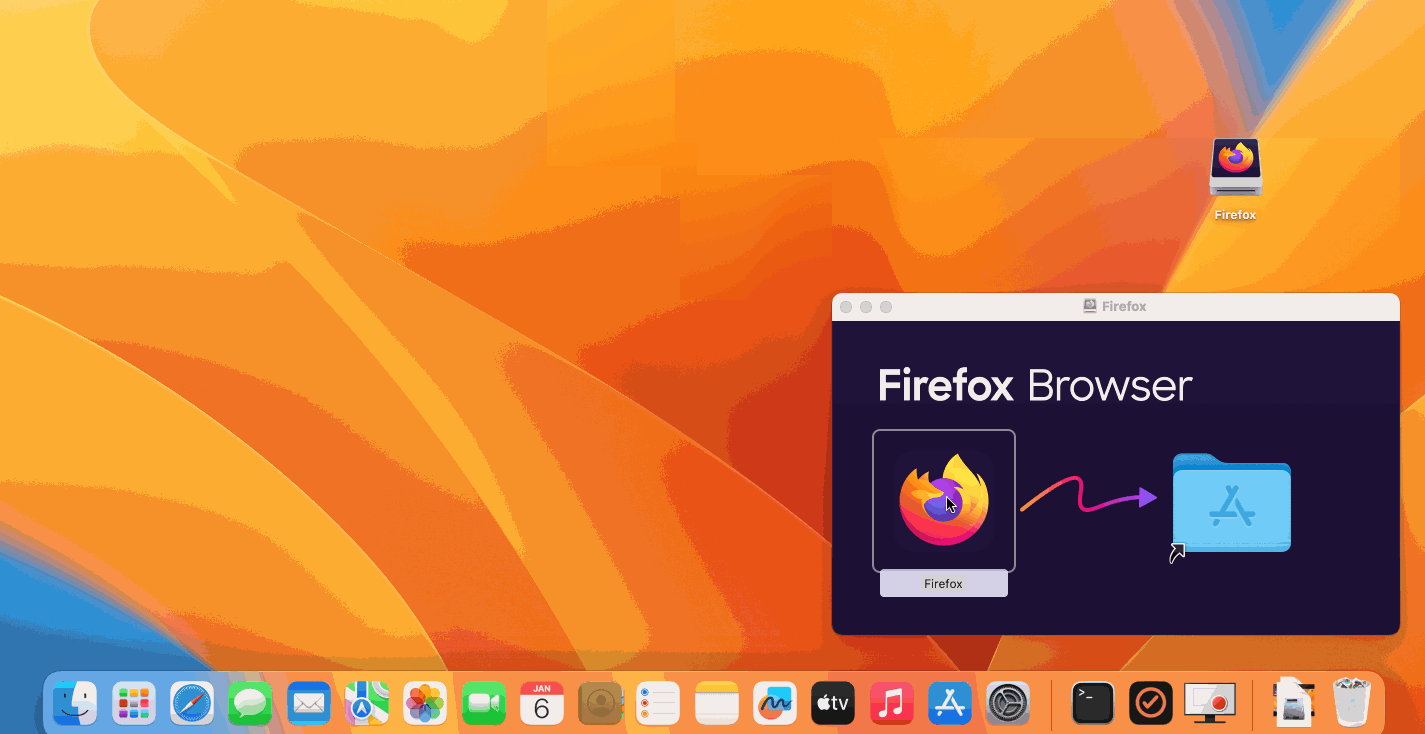
Previously only supporting package files (.pkg), this feature now supports application (.app) files. Once you’ve downloaded the file for installation, drag and drop it over the Admin By Request Dock icon. A pop-up will appear asking for your credentials – simply enter them and hit Ok to Run the installer as Admin.
Watch the GIF below to see it in action:
Machine Learning
The idea behind Machine Learning Auto-Approval is to kill two birds with one stone by allowing customers to build a Pre-Approved list as their employees use the software. This removes the need for enterprises to spend considerable amounts of time and effort figuring out and manually configuring which applications should be pre-approved ahead of time.
Instead, it allows you to create a simple rule that says, ‘if approval for an application elevation occurs X amount of times, that application is now automatically approved from then on’. This allows the system to handle creating the list of applications that are safe for approval, as applications are used.
Read the full documentation here.
Azure AD Support
A huge selling point for Admin By Request PAM solution is its flexibility and tools for granular access control; organizations can configure every setting to their specific needs and the needs of all, some, or individual users. Settings act as rules, such as whether the Run as Admin or Admin Session features are enabled, and whether or not users need approval to use them. You likely wouldn’t want the rules applied for an IT Administrator to be the same as those applied for a Customer Relations employee, so settings can be differentiated based on Sub-Settings, which allow different rules to be applied to different users and/or groups.
With macOS v4.0, we’ve built in support for Azure AD groups, meaning you can now apply Sub-Settings to existing Azure AD user and device groups.
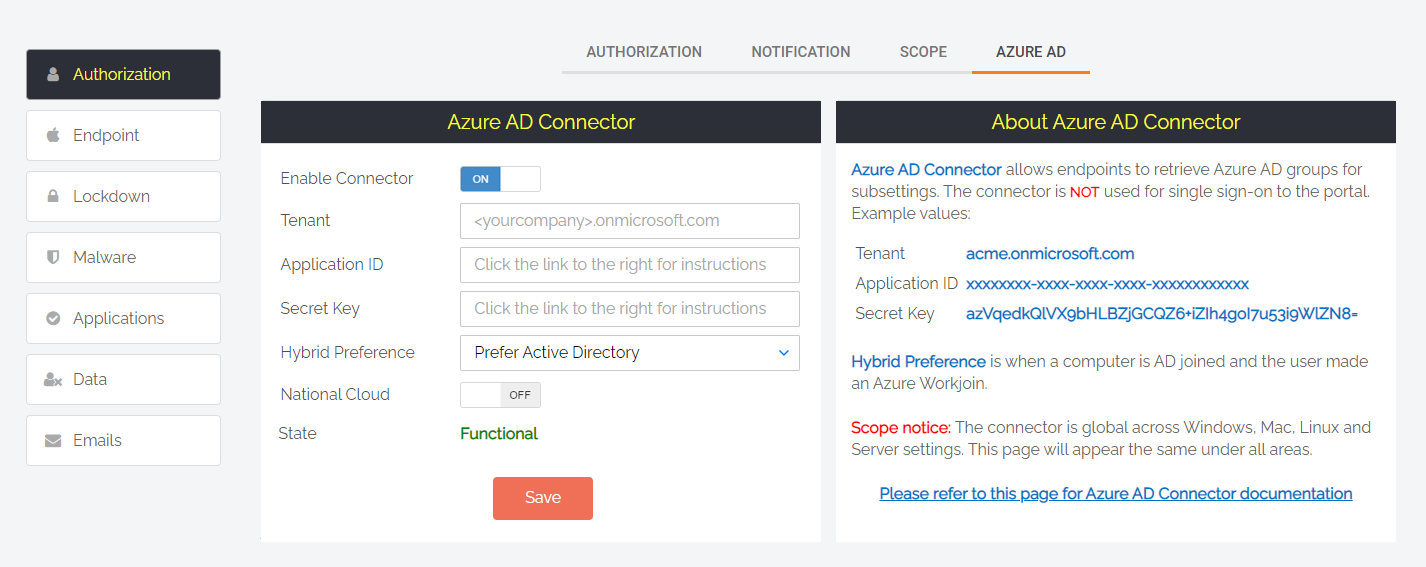
Get this feature working using our Azure AD Connector integration, found under Settings > {OS Settings} > Authorization > Azure AD:
Read the documentation for the Azure AD Connector here.
The connector configuration is shared between Windows, macOS and Linux, so if you’ve already configured it for Windows, it does not need to be re-configured for macOS.
Prerequisites
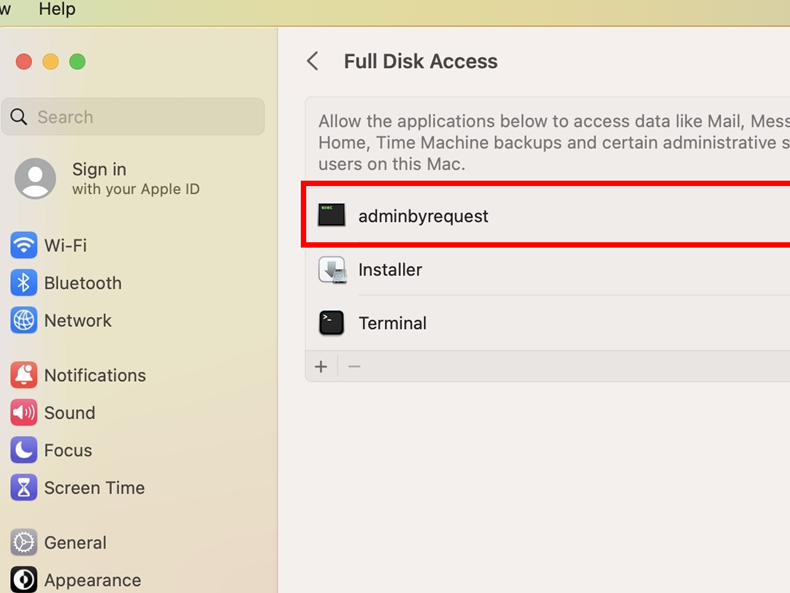
Before you get macOS v4.0 up and running, you need to ensure Admin By Request has full disk access on your Mac endpoints.
On you Mac devices, navigate to System Settings > Privacy & Security > Full disk access, and ensure this is Enabled for adminbyrequest (see screenshot below)
You can also complete this step manually using JAMF or similar.
macOS How-Tos:
This section covers the steps involved to use other key features on a macOS endpoint.
- Admin Session – To gain full administrator privileges on the endpoint for a period of time, either select the Admin By Request icon from the top toolbar, or locate and click the app icon from the Dock or Launchpad. Follow the prompts, wait for approval (if configured), and the session will commence, indicated by the timer in the bottom right-hand corner of your desktop.
- Events & Alerting – Events are automatically sent to your User Portal; navigate to Inventory from the top menu, and select Events from the left-hand menu of the Inventory page.
- PIN Code Uninstall – In your User Portal, navigate to the Inventory page and select the device you want to perform the uninstall on. Select PIN Code from the left-hand menu, and choose the Uninstall Pin tab from the top menu in this page. Click the Generate PIN button, and copy the PIIN that is displayed. On the device you want uninstall Admin By Request on, select the Admin By Request icon from the top toolbar, and click About Admin By Request. In the System window, paste the PIN copied from your User Portal, and select Uninstall.
- Break Glass Account – See documentation here.
Technical Info
For the technical documentation, see the following two pages.
Summary
This latest update for macOS brings a heap of our staple Admin By Request features – previously only available for Windows users – to the table for macOS.
Download Admin By Request 4.0 for Mac for a comprehensive, flexible, simple, and effecting Privileged Access Management experience, unified across multiple operating systems. Existing customers can find it in their User Portal, under Top Menu > Download > Download Client for Mac. New users can get it for free on our lifetime Free Plan at this link.
Questions?
If you have any questions that haven’t been answered on this page, please contact us using the chat or the contact menu at the top of the page.


